
Tutorial
From the moment you start in Settlers Online you are in Tutorial mode (Note under your portrait top left it says Tutorial) and the only way to get into the game proper is to complete all the tasks set out in your Quest List (The Scroll with the Yellow ! next to your portrait).
During the tutorial you are isolated from trading with friends or others to give you time to get to grips with systems and balancing you will need to proceed in the game. The tutorial ends at level 16 when you complete the final Tutorial Quest and start the game proper, where you are able to purchase the Branch Office that allows trade with other players.
Useful reading before you begin:
- Your Island • Natural Resources • Production Chains
- Build Queue • Proximity Bonus • Building Licences • Population Limit • Roads
- Note: it is wise for the first few levels to not build anything more than the Tutorial requires as running out of resources, especially Tools, can halt your progress.
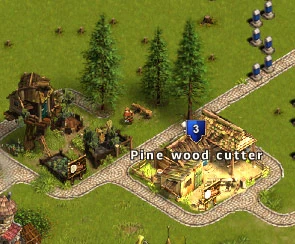
Quest 1: The Pine Wood Cutter (100 XP)
Your first task is to build your first new structure, the Pine Wood Cutter. To get your architect to work on building the new production building click on the building tool on the Bottom Bar and select the top left structure (The name of the structure and resources required to build it show when you mouse over it).
Now move your mouse to guide the new structure around your Sector, areas where it can be placed will show up highlighted. Left click once to place and watch the architect walk from your Mayor's House to the plot and start work.
A good location to place it is near a Pine Forest (you know a pine forest by the little Log symbol that apears near a cluster of trees). Place 3 Cutters to get things moving.
For this you gain 100 XP that levels you up to Level 2 and unlocks new buildings.
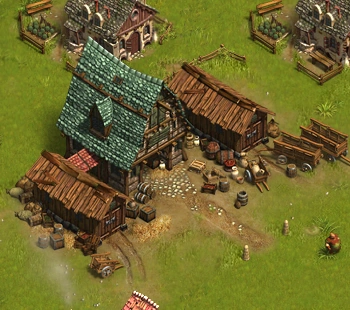
Quest 2: The Pine Wood Sawmill (50 XP)
The Pine Wood Sawmill converts the hewn logs into useable planks for building. Click on the Build Menu and the Basic Buildings should open, click Pine Wood Sawmill building and place it near your Mayor's House for the Proximity Bonus. You should also take note of Production Chains now so you can balance the amount of Logs your cutters cut and the amount of Logs your economy can proces and store.
Place 2-3 Sawmills to process your Logs.
Quest 3: Check out the Mayor’s House (50 XP)
Mayor House LVL.1
Nothing more than clicking on your Mayor's House to see that it is your inventory of products produced for use by other buildings or storage for later use.
Successful completion gets you to Level 3.
Job Done.
Quest 4: Build a Pine Wood Forester (50 XP)

Since we are mowing down trees with our Cutter it is useful to replant those lost trees too keep production continuous. In this game all island resources are static so cleared trees can't be built on but instead wait for a Forester to replant them.
Place your forster near the trees your cutter is harvesting. For this you gain 50 XP and 5 Settlers (if you don't have room for 5 new settlers they will arrive via email and once clciked on will reside in your Star Menu until you need them.)
3 Foresters can comfortably supply 2 Cutters so place 4 or 5 Foresters to get your things started.
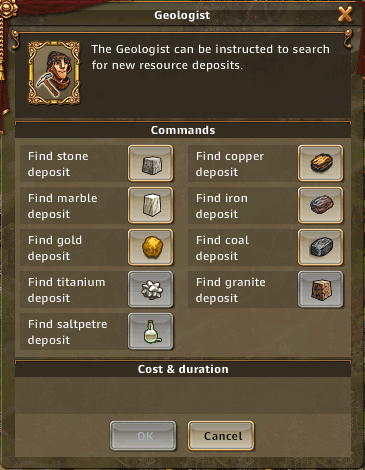
Quest 5: Geologist's Stone Search (50 XP)

New we need to add stone into the mix to facilitate higher quality buildings. You recieve a Geologist in your Star Menu.
- Click his portrait (under the All or Specialist Tab) in the Star Menu.
- Mouse over the top left item for the Stone deposit search and click on it.
- See that it takes 4minutes to complete the search
- Preass the OK button to start the search
At any time you can mouse over the Geologist's portrait in the Star Menu to see how far into his search he is. Once completed you get an audio confirmation of a successful search and a stone quarry will appear somewhere on the map. Keep searching for Stone until you can find no more deposits in the areas you hold.
Congratulations you Leveled up again. See Resources and it's map to get a better idea of what just happened.
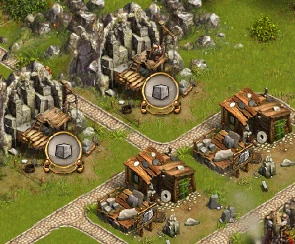
Quest 6: Build a Mason (100 XP)

Now you have a Deposit of Stone located you need to mine and fashion it into usable blocks. All this is done by your Mason.
Click on the Build Menu and the Basic Buildings should open, click Mason building and place as near to the found Stone Deposit as possible.
A good move with blocks of all kinds is to place 2 Masons next to the deposit to gather twice as fast. Level up to Level 4.
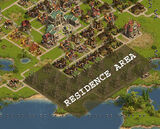
Quest 7: Build a Residence (100 XP)

Residence Area
Your population limit will start to get stretched and you need to make more space for new Settlers to fill. This is very important to understand and we suggest you read the Population Limit and Proximity Bonus articles before continuing.
Click on the Build Menu and the Basic Buildings should open, click Residence building and place a residence. Ideal locations for these are around your coast: away from your mayor's house and resources.
You gain a handsome 100 xp, 8 Settlers and a new level to increase your confidence and power.
Quest 8: Build a Fisherman (100 XP)

Fishstocks
Fish is handy but not in the way you might think.
Fish is used in the making Buffs that will speed up your production without increasing the use of resources i.e. twice as much out for the same input.
Click on the Build Menu and the Basic Buildings should open, click Fisherman building and place a it along your coast neat a Fish deposit, indicated by a fish symbol.
Completion will gain you 100 xp, 5 Settlers and Level 6.
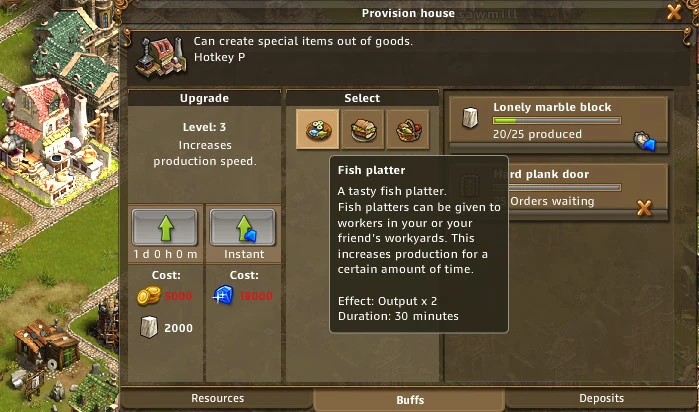
Quest 9: Build a Provision House (25 XP)
Now to make use of those gathered Fishies.. first we need a building to process them.
Click on the Build Menu and the Basic Buildings should open, click Provisions house and place it on your map, I like to place it close to my Mayor's House as it is a building you will need to use often but since it has no Proximity Bonus you can place it anywhere.
You gain 25 xp and 50 Fish that will be useful to quickly do the next Quest.
Quest 10: Build a Buff (25 XP)

Provision Buffs
Now we have the fish we can make a Buff. Click the Provision House and Click the Buff tab.
Click the Fish Platter option and move the slider to 5 Fish platters (consuming 50 Fish). Click ok and you will see the platters added to the provision queue.
Once the build is complete you get an audio confirmation and 5 fish platters are added to your Star Menu.
Completion gives you 25 XP and 5 Settlers.
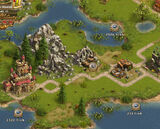
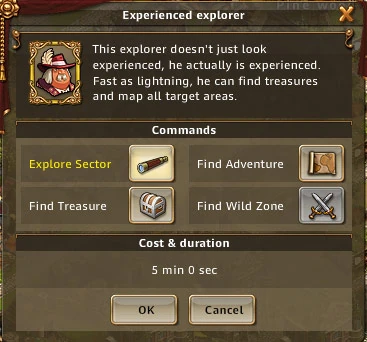
Quest 11: Explore a New Sector (25 XP)

New Sector
You will note that most of your island is shrouded in Cloud cover that stops you seeing and exploring beyond your borders. Thankfully you receive an Explorer to deal with just that.
Click the Star Menu and click on your new Explorer. Select Explore Sector and click OK.
Off he goes for a 10 minute search for new lands that are adjcent to any of your existing held Sectors. This time he will find the empty Sector 4 that is north of you. Once he finsihes immediately send him on another Search to reveal Sector 2 to the East.
25 XP, 30 Fish and another level is yours.
Quest 12: Conquer the New Sector (100 XP)
To take this new Sector to the North simply place a Storehouse withing the empty area.
Click on the Build Menu and the Basic Buildings should open, click Storehouse and palce just North East of the mountain range.
Gain 100 XP, 5 Settlers and a level.
Quest 13: Search for Copper (50 XP)
Remember the Stone Mason Quest... well now we'll do the same for Copper Mining.
- Click Geologist portrait (under the All or Specialist Tab) in the Star Menu.
- Mouse over the top right item for the Copper deposit search and click on it.
- See that it takes 10minutes to complete the search
- Preass the OK button to start the search
At any time you can mouse over the Geologist's portrait in the Star Menu to see how far into his search he is. Once completed you get an audio confirmation of a successful search and a copper deposit will appear somewhere on the map.
Keep doing Copper and Stone Searches until your Geologist can't find any more.
You gain 50 XP and 5 Settlers for your efforts.
Quest 14: Build a Copper Mine (50 XP)


Copper Mines are slightly different to Stones in that a single Copper mine is palced directly ontop of the found deposit and will mine it till it is exhausted.
Click on the Build Menu and then on the new tab Intermediate Buildings, click Copper Mine and place on top of the Mine. {C}You can find 3 deposits in these first 2 Sectors so find them all and place Mines on each.
50 XP and a very generous 35 Gems are your reward with a new level on top.
Quest 15: Coal (100 XP)

Now to make more use of those Pine Logs. Coal is key to all Weapons production and 4-6 Coking houses will help greatly. Lets start off with 2 or 3.
Click on the Build Menu and then on Intermediate Buildings, click Coking House and place near your Mayor's House.
100 XP, 5 Settlers, 10 Tools and yet another level.
Quest 16: Smelting (100 XP)

To take advantage of that Copper and Coal piling up lets get into Bronze manufacture.
Click on the Build Menu and then on Intermediate Buildings, click Copper Smelter and place 2-3 near your Mayor's House. Now do the same with 1 or 2 Toolmakers.
100 xp, 5 Settlers, 40 Gems and another level.
Quest 17: Build a Barracks (50 XP)


New thinkgs are getting itneresting and as we prepare for war.
Click on the Build Menu and then on Intermediate Buildings, click Barracks, I like to place it close to my Mayor's House and Provision House as it is a building you will need to use often but since it has no Proximity Bonus you can place it anywhere.
50 XP and 5 Settlers.
Quest 18: Check on the Barracks (50 XP)
Another simple task. Simply click the new Barracks building and see the option you have inside for buildings an army. Job done!
50 XP and as you upgrade to Level 13 you should notice your dirt roads start to look a bit more fancy (sadly this is purely cosmetic).
Quest 19: Beer Quest (100 XP)
Now a whole new challange and production line begins as we start ot gather the items we'll need to mount an attack.
- Click on the Build Menu and then on Intermediate Buildings, click Farm and place it near the Storehouse you placed in Sector 4 (the new Sector North of your starting Sector).
- Click Intermediate Buildings, click Field and place 2 near the Farm but away from the Storehouse.
- Click Intermediate Buildings, click Brewey and place it near the Mayor's House.
- Click Intermediate Buildings, click Well and place 2 Wells away from all your buildings, possibly NNE of your Mayor's House.
100 XP and level up.
Quest 20: Make a Sword (30 XP)
Click on the Build Menu > Intermediate Buildings > Bronze Weaponsmith and place it close to my Mayor's House as this is one building where the Proximity Bonus will mount up massively over time.
30 XP, 120 Hard Wood Planks and 100 Marble.
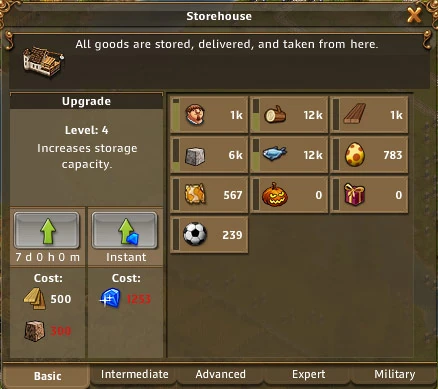
Quest 21: Upgrade (30 XP)
So you might be wondering why the sudden appearance of Marble & Hard Wood in the previous Quests Reward... well wonder no more the next Quest is to upgrade any building with these quality products.
To upgrade Click a building and look down the leftside of the popup box for the upgrade requirements and the Upgrade arrow above them. Click it to set an upgrade in motion.
Now the choice is yours but for my money the best use is upgrading your Storehouse as once full with a prodsuct the building supply it will stop working and thats hard to balance early on so upping the storage space is very handy indeed. 30 XP, 25 Brewand 50 Bronze Swords.
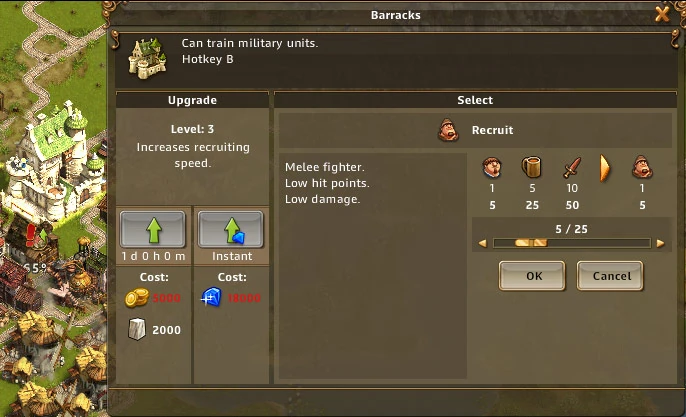
Quest 22: Train 5 Recruits (40 XP)
Recuits are the basic coldier and you will be making them in the millions (and i'm not joking about that),
- Click your Barracks
- Click recuits icon on the top left.
- Move slider to 5 recuits
- Press OK
the process should take 15 minutes but once done you complete Quest 22 for 40 XP, 20 Gold Coins, 5 Settlers and a new level.
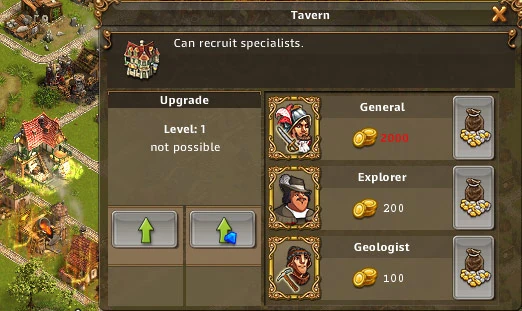
Quest 23: Build a Tavern and Hire a General (20 XP)
At last we get the Tavern.
Click on Build Menu > Intermediate Buildings > Tavern and because it has no Proximity Bonus you can place it anywhere and preferably away from your Storehouses.
Now to Spend those 100 Gold Coins we've aquired.
- Click the Tavern
- Click Hire a General to purchase him and have him added to your Star Menu.
20 XP and 5 Settlers.
Quest 24: Station your Troops (20 XP)
Now we need to place our General on the island so he has a base from which to attack.
- Click the Star Menu
- Click the General and place his Garrison on your island.
A good location to place him is in the most SE area of your island near the boarder with the Sector to the East as that is the Sector we are going to attack first.
20 XP and 5 Settlers.
Quest 25: Assigning Troops (20 XP)

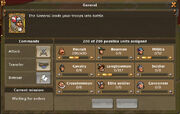
To assign troops to a general
- Click the Barracks
- Move the Recuits Slider to add up to 200 Troops to your Generals army.
- Click OK
20 XP and 5 more Settlers!
Quest 26: Bandits (35 XP)
Now attacks are somewhat different in Settlers Online and you are going to lose men in 99% of battles the trick is to loose as few as possible and never loose a more powerful troop when a Recuit can take the damage for him. As all we have now is Recruits start amassing as many as possible to take ut the first camp.
For a How to Guide on clearing the island see our Island Clearing Guide.
Completion of this quest you will gain 35 XP, 100 Gold Coins, 50 Gems, a level and the end of the Tutorial Mode and access to Trade buildings.